-
Products
 Mobile Utilities
AVCLabs PhotoPro AI is a powerful photo editing software harnessing artificial intelligence and machine learning. It empowers users to effortlessly improve photo quality by sharpening details, reducing noise, and upscaling images without compromising their integrity. This versatile tool also offers color correction and adjustment, object removal, background removal and B&W coloring functions, making it a valuable asset for photographers.
AVCLabs PhotoPro AI stands out as a superb photo editing application designed with user-friendliness in mind, providing an intuitive interface and a range of tools and features that cater to both professional photographers and enthusiasts. Utilizing AI and advanced algorithms for precise editing like enhance, inpaint,matting, upscale, colorize, color correction and facial enhancement resulting in stunning and lifelike visual improvements.
Step 1
Download and install AVCLabs PhotoPro AI
Download and install AVCLabs PhotoPro AI on your computer. After installation, the software will automatically retrieve essential components tailored to your system configuration.
Step 2
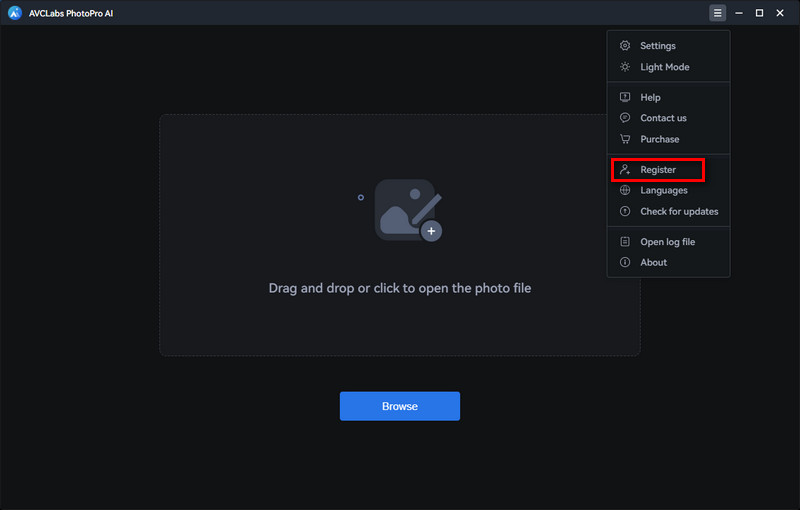
Open the Register Window
Upon completing your initial purchase, your account will be automatically generated, and a registration code will be dispatched to the email address associated with your purchase. Just go to the program menu icon in the upper right corner and select the "Register" option to activate your account. If you do not have an account, you can utilize the trial mode.
Step 3
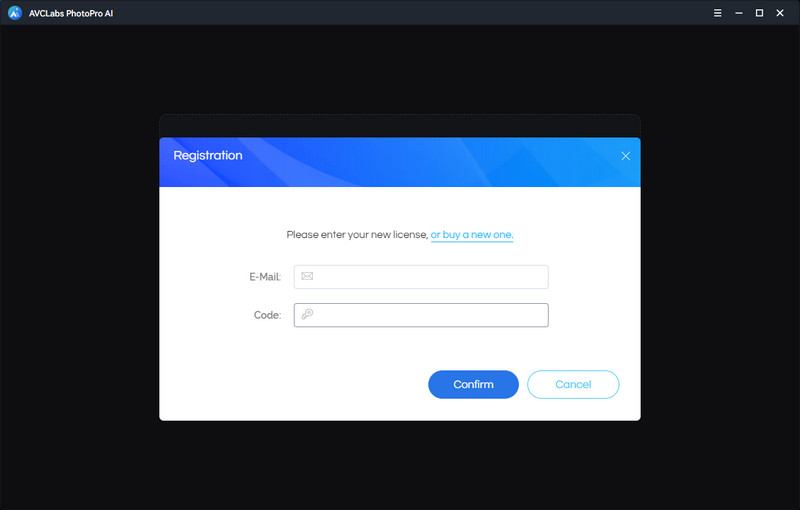
Registe your Account
Input your registration information in the popup window. We recommend copying and pasting the register email and code into the registration dialog.
Step 1
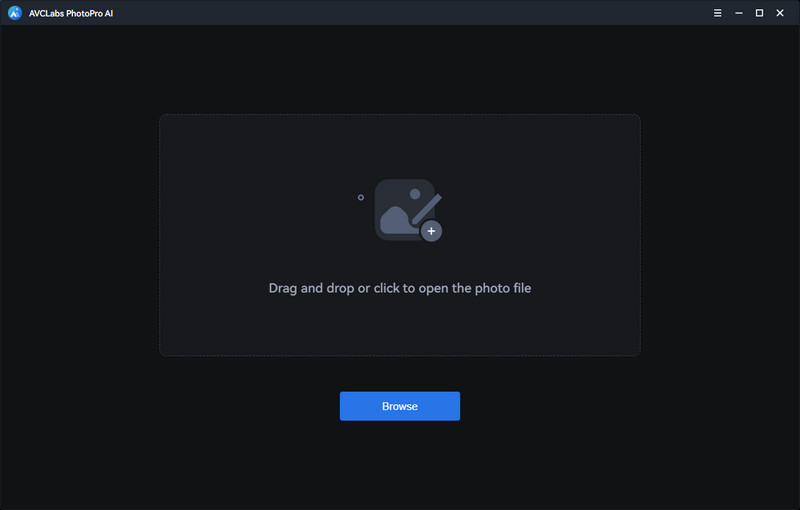
Upload the Photo
Upload your photo into AVCLabs PhotoPro AI by clicking on Browse > File > Open or dragging and dropping it onto the main interface.
Step 2
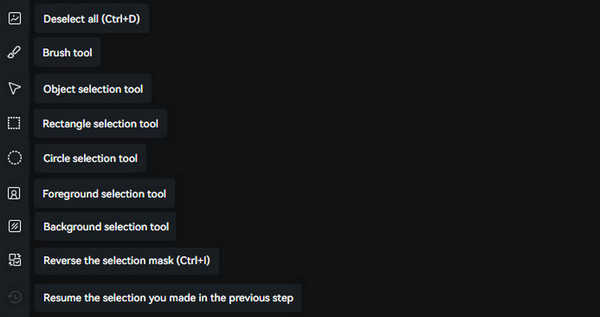
Use Selection Tools
Various selection tools are available in AVCLabs PhotoPro AI to enable users to precisely choose and manipulate specific areas of an image. These tools serve different purposes and offer various methods for making selections. If your intention is to edit only a specific portion of the photo, it is advisable to utilize the selection tool to precisely delineate the desired area before proceeding with subsequent editing actions.
Step 3
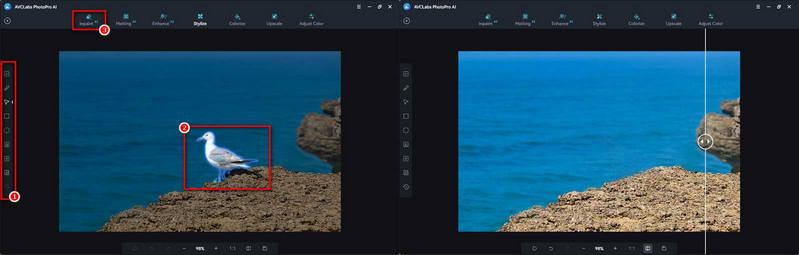
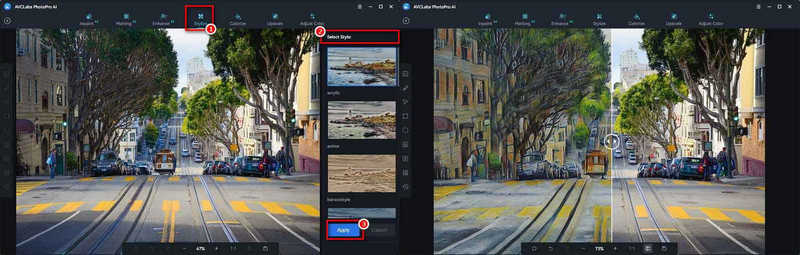
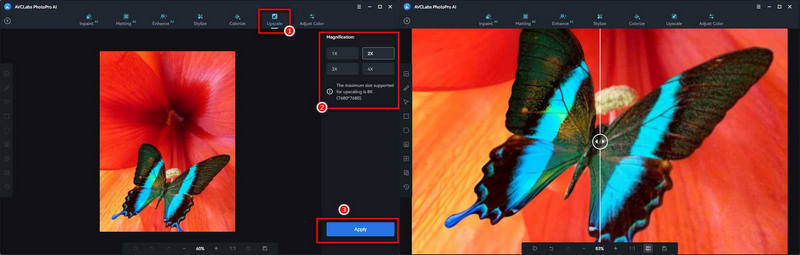
Apply AI Model and Preview
For different image editing purposes, you can choose different AI models. Currently There are seven AI models shown on the top menu bar: Inpaint, Matting, Enhance, Stylize, Colorize, Upscale and Adjust Color.
AI Inpaint: AI Inpaint is great for removing anything you don’t want in an image, including people, objects, watermarks and text. Jsut use the selection tool to completely cover the things you want to remove, then click Inpaint AI.
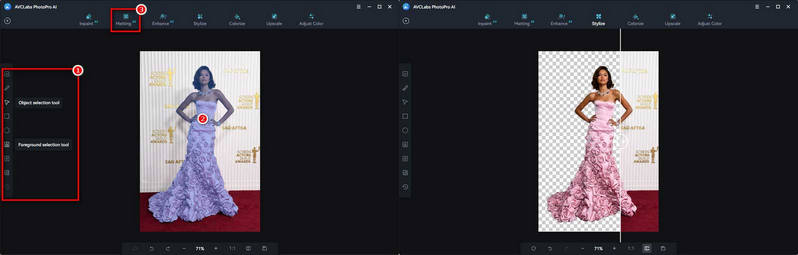
AI Matting: Combining AI Matting with the foreground or background selection tool is very suitable for removing or replacing the photo background. Use the selection tool to select the entire background, then click Matting AI. AI will remove the entire background, then you can change the background color or customize the background.
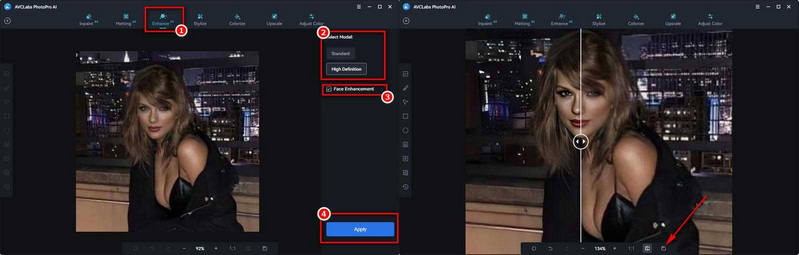
AI Enhance: To enhance photo quality, just click Enhance AI and select a model according to your needs. To recover facial details from blurry images, it is recommended to check Face Enhancement. Then click the Apply button to stat enhancement.
AI Stylize: If you want your images to have a painterly or impressionistic effect, it is recommended to use the Stylize model and select one filter you like, then apply it. You can cancel or change the filter at any time.
AI Colorize & Adjust Color: Using AI Colorize allows you to swiftly transform black and white photos into colored ones. Combined with color adjustment tool to adjust the Rending Index and change the colorizing effect till you find the most suitable color.

AI Upscale: AI Upscale is used to improve the photos' quality and resolution. Just choose Upscale and go to the Magnification option. In this option, you can choose 1X, 2X, 3X and 4X to enhance image resolution and increase photo clarity.
Step 4
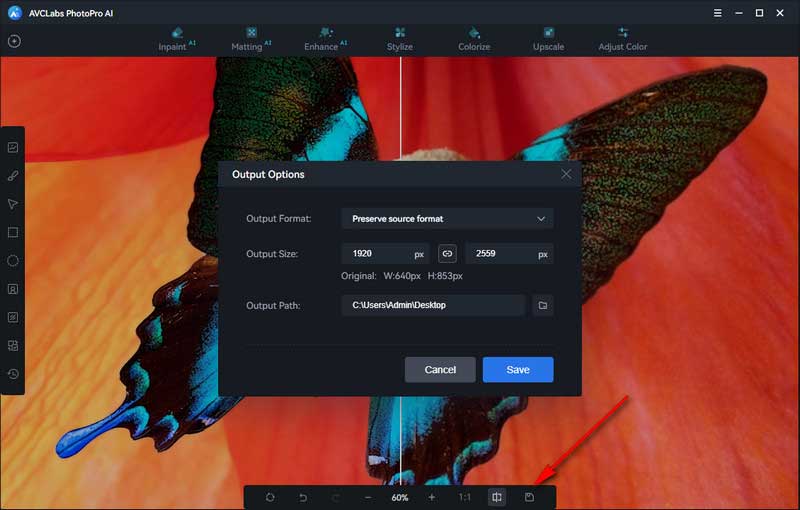
Save Image
If you are satisfied with the edited image, just click Save. Then select the output format, output size and output path, and it will be automatically saved to the corresponding folder.
Money Back Guarantee
100% Secured and Clean
Free Technical Support
Customer Service within 24 Hours
© 2005-2026 Anvsoft Inc.All Rights Reserved.